Reach your goals Go to BKOOL

HRV refers to the fluctuations in the interval between consecutive heartbeats, known as the RR interval. In a healthy and well-adapted heart, these intervals are not constant, which indicates a higher capacity of the cardiovascular system to respond to different stimuli. The greater the HRV, the more adaptive the autonomic nervous system is, and the better the body’s ability to manage stress, both physical and mental.

There are different metrics for measuring HRV, but the most common include RMSSD (root mean square of the successive differences between RR intervals) and SDNN (standard deviation of the RR intervals). Each of these metrics can provide a different picture of how the body is responding to training loads.

Importance of HRV in Sport

In the field of endurance sports, and more specifically in cycling, HRV has gained importance due to its ability to monitor the athlete’s adaptation and recovery status. While traditional metrics like heart rate or power offer an external view of performance, HRV allows for an analysis of how the autonomic nervous system is responding to the demands of training.

When a cyclist is overtraining or experiencing high levels of stress, their HRV is likely to decrease, indicating a dominance of the sympathetic nervous system, also known as the “fight or flight” response. Conversely, elevated HRV is typically associated with parasympathetic dominance, reflecting a state of adequate recovery and rest.

In summary, HRV enables a more holistic approach to training, providing a tool to assess both physical performance and the overall well-being of the cyclist.
Source: Canva

Methodology of HRV Analysis in Cyclists

To analyse HRV in cyclists, it is essential to have tools that can accurately record RR intervals. There are various apps and devices that can measure HRV, such as heart rate monitors capable of capturing RR data and mobile apps that process these readings.

The most common form of analysis is through morning measurements, where the cyclist records HRV upon waking, before any activity. This provides a daily baseline that reflects the athlete’s recovery status. Another method is continuous measurement during training, which allows for identifying how the body responds to different intensities and volumes of exercise.

HRV analysis should not focus solely on a specific day; instead, it is necessary to evaluate trends over time. Sudden changes in HRV can indicate overtraining or the need for longer recovery periods.

Factors Influencing Heart Rate Variability

While HRV is a powerful tool, it is important to understand that many factors can influence its readings. It is not just training that affects HRV; other elements such as sleep quality, nutrition, emotional stress, and alcohol consumption can alter the results.

For example, a poor night’s sleep can significantly reduce HRV, while a good night’s rest can improve it. Similarly, chronic stress unrelated to exercise can lower HRV, potentially masking the cyclist’s true recovery status. For this reason, it is crucial that HRV analysis be carried out within the context of the athlete’s entire life, not just in terms of physical training.

HRV as an Indicator in Training Planning

HRV’s ability to reflect the response of the autonomic nervous system makes it a valuable indicator for training planning. For instance, if a cyclist shows a consistent decrease in HRV, it could signal that they are entering a state of overtraining, requiring a reduction in workload or an increase in recovery time.

On the other hand, an increase in HRV might suggest that the cyclist is well-recovered and ready to take on a high-intensity training session. In this way, HRV can be used to dynamically adjust training loads, ensuring that the athlete trains when they are physically prepared and rests when necessary.

HRV and Its Relationship with Fatigue and Recovery

Fatigue is an inevitable element in high-performance cycling, but what makes the difference is how a cyclist manages this fatigue to avoid injuries or the dreaded overtraining syndrome. HRV acts as an early sensor of accumulated fatigue. When HRV decreases significantly over several consecutive days, it is likely that the body is not recovering adequately, increasing the risk of injury, performance decline, and long-term health issues.

In this sense, HRV allows the identification of imbalances before they manifest as an injury or a drop in performance, giving the cyclist the opportunity to adjust their training or recovery approach proactively.
Source: Canva

Technological Tools for Measuring HRV in Cyclists

As HRV has grown in popularity, so have the technological tools designed to measure it. Currently, there are heart rate monitors capable of recording RR intervals with high precision, from brands like Polar and Garmin. These tools sync with mobile apps that offer detailed HRV analysis and allow for trend tracking over time.

In addition to traditional devices, specific mobile apps like Elite HRV and HRV4Training have been developed specifically for athletes. These apps not only measure HRV but also provide recommendations on how to adjust training based on the observed trends.

Practical Applications of HRV in Training Management

Once an HRV measurement routine has been established, the next step is to apply this data in practice. For example, if a cyclist notices that their HRV is decreasing, they might decide to reduce the intensity of their training, opt for an active recovery session, or even take a complete rest day.

Similarly, if HRV is high and stable, it could indicate that the body is well-prepared to handle high-intensity training, such as intervals or long-distance rides. The key is to individualise training based on the body’s physiological response, rather than following a rigid plan that does not consider the cyclist’s recovery status.

Limitations and Considerations in the Use of HRV

Despite its usefulness, it is important to bear in mind that HRV is not infallible. External factors such as stimulant use, dehydration, or even changes in ambient temperature can affect the readings. Therefore, HRV should be interpreted alongside other metrics, such as subjective fatigue levels, performance indicators, and sleep quality.

Additionally, genetics can influence heart rate variability, meaning what is “normal” for one cyclist may not be for another. For this reason, comparing between individuals is not always helpful, and the ideal approach is for each athlete to focus on their own trends and patterns.

Conclusions

Heart rate variability has become an indispensable tool for cyclists looking to optimise both their performance and recovery. HRV analysis allows for real-time adjustments to training loads, ensuring that the athlete is always training efficiently and avoiding states of overtraining or chronic fatigue.

By using HRV consistently and in combination with other metrics, cyclists can gain a more complete view of their physical state, enabling them to make informed decisions about how to manage their training and rest more effectively.

BKOOL is the most complete cycling simulator on the market, try it FREE for 7 days!

Rest is a fundamental aspect of both physical and mental performance, especially for those looking to improve their fitness or who face high demands in their daily activities. However, when we talk about rest, we don’t just mean long breaks without activity; we also refer to active recovery.

Just ask any professional cyclist. You’ve probably seen them on the rollers after finishing a stage more than once. Their secret? A flawless approach to active recovery in cycling.

This concept has gained popularity in the sports and health fields as it offers an effective way to optimize recovery and enhance overall performance. In this article, we’ll explore what active recovery is, its benefits, and how to implement it correctly to achieve the best results.

What is active recovery?

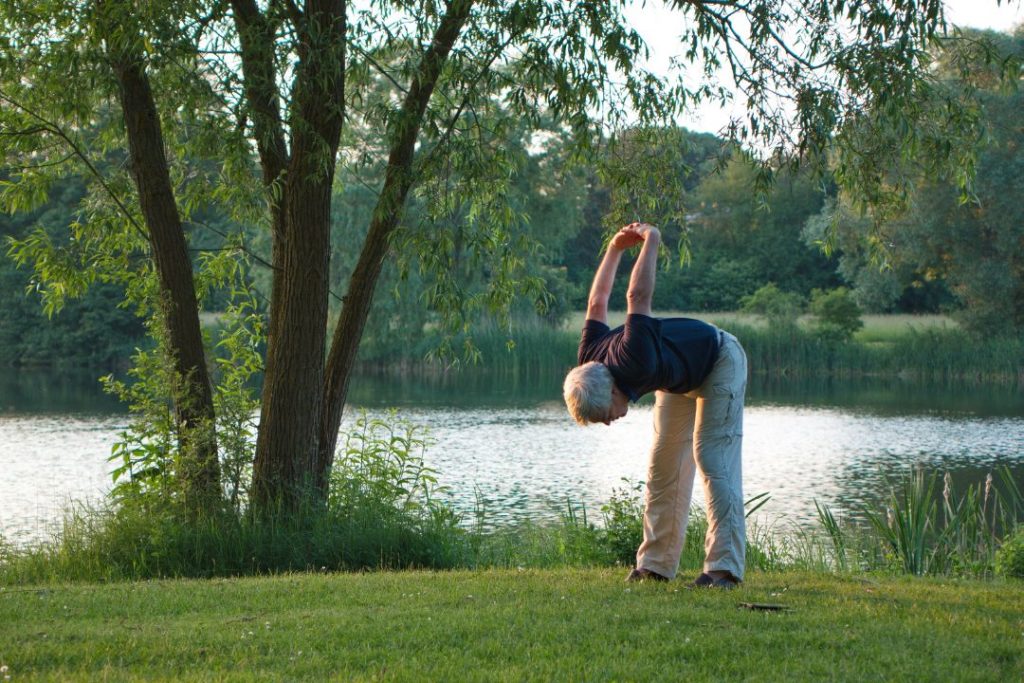
Active recovery refers to engaging in light physical activities during rest periods instead of complete inactivity. Walking, gentle stretching, relaxed swimming, or practicing yoga are some examples of active recovery.

Source: Canva

The main idea is to keep the body moving moderately to improve circulation, reduce lactic acid buildup, and promote faster, more efficient recovery.

The key is to keep the intensity low so that these activities do not place additional physical demands on the body but instead aid in muscle and cardiovascular system recovery.

Benefits of Active Recovery for Enhancing Cycling Performance

Without proper recovery, the body cannot repair muscle tissues or adapt to physical effort, which can lead to chronic fatigue and injuries. Moreover, active recovery in cycling not only speeds up the recovery process but also enhances endurance, prevents injuries, and improves metabolic efficiency.

Enhancing Endurance and Performance

Incorporating recovery training sessions allows cyclists to maintain training volume without compromising the quality of their main sessions. These sessions help to:

  • Boost mitochondrial efficiency: Low-intensity aerobic activity improves mitochondrial function, increasing ATP energy production.
  • Preserve neuromuscular plasticity: It prevents disconnection between the nervous system and muscles, maintaining coordination and pedaling technique.
  • Accelerate muscle adaptation: It enables more efficient recovery, promoting muscle growth and strengthening.

Reducing Muscle Fatigue and Preventing Injuries

Muscle fatigue results from the accumulation of metabolic waste and muscle fiber damage. Active recovery helps counteract these effects by:

  • Enhancing muscle oxygenation, which speeds up toxin elimination.
  • Regulating inflammation, reducing oxidative stress and the buildup of inflammatory cytokines.
  • Improving flexibility and joint mobility, preventing muscle imbalances that could lead to injuries.

Let’s take a deeper look at these aspects.

Why Is Active Recovery Important for Muscle Recovery and Performance?

One of the most extensively studied aspects of sports training is the impact of active recovery on muscle regeneration. During physical exercise, especially high-intensity activities, muscles experience significant stress, leading to small damages or microtears in their fibers. These microtears are a natural part of the muscle adaptation process, but for this adaptation to be effective, proper recovery is essential.

This process is known as supercompensation. After an intense workout, the body experiences fatigue and wear. If it gets adequate rest, it doesn’t just recover—it improves, becoming better prepared for future exertion. However, if recovery is insufficient, fatigue accumulates, negatively affecting performance and increasing the risk of overtraining (commonly referred to as muscle overload).

In this context, active recovery plays a crucial role. Engaging in low-intensity physical activity during recovery periods speeds up muscle regeneration by improving blood circulation in affected areas. This process helps eliminate waste products and delivers essential nutrients needed for muscle repair. As a result, muscles are better prepared to handle upcoming training sessions or competitive events.

At cellular level, active recovery influences several key processes:

  • Metabolite Removal: Intense exercise generates waste products like lactic acid, which can lead to fatigue and muscle stiffness. Active recovery helps eliminate these by increasing blood flow.
  • Muscle Protein Synthesis: Muscle fiber damage activates anabolic pathways such as mTOR (mammalian target of rapamycin), which stimulates protein synthesis and muscle tissue regeneration.
  • Regulation of Oxidative Stress: Exercise generates free radicals that can cause cellular damage. Active recovery enhances the production of antioxidant enzymes like superoxide dismutase (SOD) and catalase, reducing oxidative stress.
  • Glycogen Replenishment: Muscles rely on glycogen as their primary energy source. During active recovery, glucose uptake remains elevated, accelerating the replenishment of energy reserves.

Active recovery has proven effective in alleviating Delayed Onset Muscle Soreness (DOMS), the discomfort that typically appears 24 to 72 hours after intense exercise and can even hinder daily activities. Keeping the body in motion through light activities helps reduce the severity of this soreness, promoting a smoother and more effective recovery.

Additionally, active recovery helps maintain overall physical condition by preventing the loss of mobility and flexibility. Prolonged inactivity can lead to stiffness, which may increase the risk of injuries or a decline in performance.

Another key benefit lies in mental well-being, particularly in managing stress. Engaging in low-intensity exercise, especially outdoors, enhances mood, lowers stress levels, and boosts overall well-being. In summary, active recovery supports not only physical recovery but also mental health, which is essential for optimal performance.

Differences Between Passive and Active Recovery in Cycling

Understanding the distinction between active and passive recovery is essential to determine which approach is best suited for a given recovery goal.

  • Passive recovery involves completely stopping physical activity, allowing the body to recover without any additional stimulus. This method is useful in cases of extreme fatigue, severe injuries, or illnesses, where any movement could worsen the condition.
  • Active recovery, as we’ve discussed, helps maintain blood flow and mobility without overloading the muscles. It is particularly beneficial after high-intensity training sessions or competitions, where fatigue is significant but no injuries prevent light movement. In these situations, active recovery can prevent stiffness and promote faster recovery compared to passive rest.

Ultimately, the choice between active and passive recovery depends on physical condition, fatigue levels, and specific recovery goals. However, in most cases, active recovery provides significant advantages, particularly in accelerating recovery and maintaining overall fitness.

Examples of Active Recovery Sessions for Cyclists of All Levels

There are many ways to incorporate active recovery into a routine, and the best choice depends on individual activity levels and personal preferences. Here are some popular options:

  • Walking: A 20-30 minute light walk is an excellent way to boost circulation without overloading the muscles. It’s particularly recommended after an intense training session or a sedentary workday.
  • Dynamic stretching: Gentle, controlled stretches help improve flexibility and reduce muscle stiffness. These can be done at any time of the day and are especially useful after exercise.
  • Swimming: Relaxed swimming engages all muscle groups without high-impact stress. The water’s natural resistance also helps improve circulation while keeping movements smooth and controlled.
  • Yoga or Pilates: These disciplines combine gentle movements with breathing techniques, promoting relaxation and recovery. They are great options for active recovery as they enhance mobility and balance.
  • Low-intensity cycling: Riding at a relaxed pace is an effective way to maintain cardiovascular activity without adding excessive fatigue. It’s particularly useful for cyclists who want to stay in motion without straining their muscles.

Easy Pedaling Routines for Beginners

For beginner cyclists, effective active recovery can be achieved with 20-40 minute rides at low intensity (50-60% of max heart rate or <55% of FTP) on flat terrain or on a roller with minimal resistance.

Mobility and Strength Exercises for Intermediate Level

Intermediate cyclists can complement their recovery training with mobility and light strength exercises, such as:

  • Dynamic stretching (hip, ankle, and spine mobilization).
  • Core and stability work (glute bridges, planks, and resistance band exercises).
  • High-cadence, low-resistance pedaling sessions (ideal for muscle recovery without inducing fatigue).

Advanced Recovery Training Protocols for Experts

Advanced cyclists can incorporate more specific active recovery strategies, such as:

  • Recovery rides in low power zones (<55% FTP) to improve circulation.
  • Muscle electrostimulation sessions to reduce inflammation.
  • Contrast baths (cold-heat) and sports massage to accelerate muscle regeneration.

Practical Tips for Effective Recovery Training

To reap the benefits of active recovery, it’s important to follow some basic guidelines:

Controlling Intensity and Duration in Active Recovery

For active recovery in cycling to be effective, controlling the intensity and duration of sessions is essential. The ideal approach is:

  • Keep the intensity low (50-60% of max heart rate or <55% of FTP).
  • Limit easy pedaling to 30-45 minutes to avoid additional stress.
  • Prioritize flat terrain or indoor training with minimal resistance.

Nutrition, Hydration, and Other Key Aspects of Active Recovery

Nutrition and hydration play a crucial role in recovery. It’s recommended to:

  • Consume a mix of carbohydrates and proteins within the first hour after training.
  • Maintain proper hydration to replenish electrolytes and prevent cramps. Check out our guide about recovery drink for cyclists.
  • Prioritize quality sleep (7-9 hours per night) to optimize muscle regeneration. Learn more about how to improve sleep.
Source: Canva

Common Mistakes When Implementing Active Recovery

  • Not incorporating active recovery into the routine: Planning light activities on rest days can significantly improve recovery without interfering with performance.
  • Not listening to your body: Paying attention to the body’s signals is essential. If you experience pain or exhaustion, it’s better to opt for passive recovery or consult a professional.
  • Repeating the same exercises: Changing active recovery activities helps target different muscle groups and keeps things interesting.
  • Not allowing enough recovery time: While active recovery is beneficial, it should not replace complete rest days when the body truly needs to recover. The balance between active and passive recovery is crucial to prevent overtraining.
  • Choosing activities that aren’t suitable for your level of fatigue or fitness: This can lead to injuries. It’s important to select activities that match your fitness level and progress gradually. One great option, as mentioned, is low-intensity cycling, and with bad weather approaching, using a cycling simulator is an ideal alternative.

If you want to take your active recovery in cycling to the next level, try roller sessions with the BKOOL platform, where you can do personalized workouts from home. Optimize your recovery without losing your pedaling rhythm and keep your performance at its best. Your body and performance will thank you!

BKOOL is the most complete cycling simulator on the market, try it FREE for 7 days!

Track cycling is one of the most demanding disciplines in the cycling world, where speed, strategy, and endurance combine to push cyclists to the limit of their abilities. The constant pursuit of performance improvement has led many cyclists to incorporate advanced technologies into their training, with the cycling simulator being one of the most effective and popular tools. But how can this technology be used to replicate track conditions and enhance performance? This article is designed to guide you through this process, offering practical tips and techniques you can apply from the comfort of your home.

The importance of track cycling

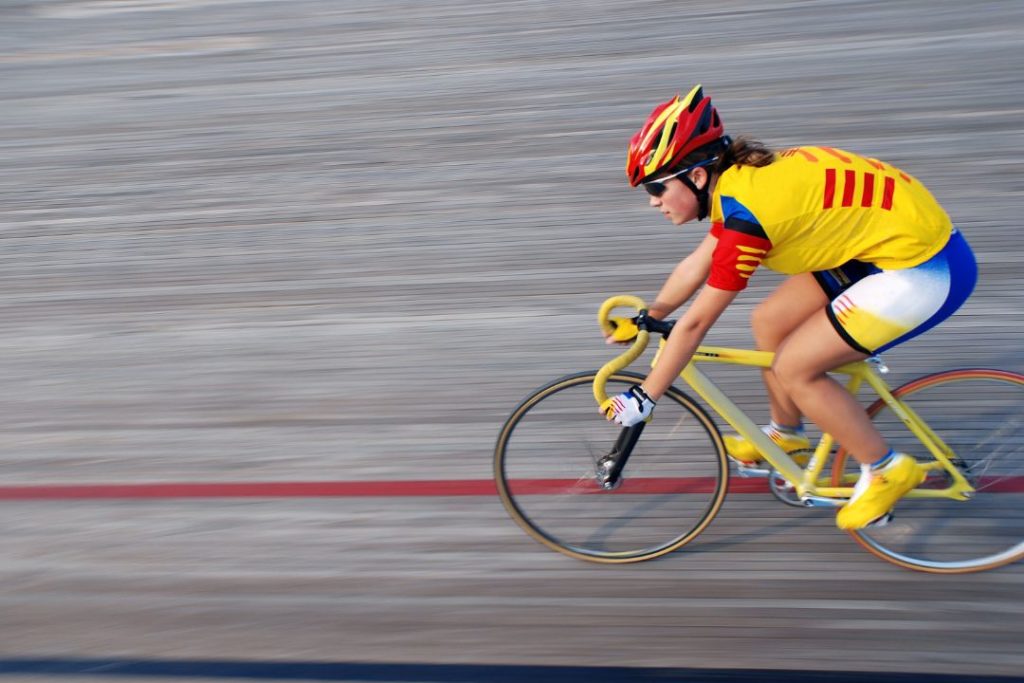
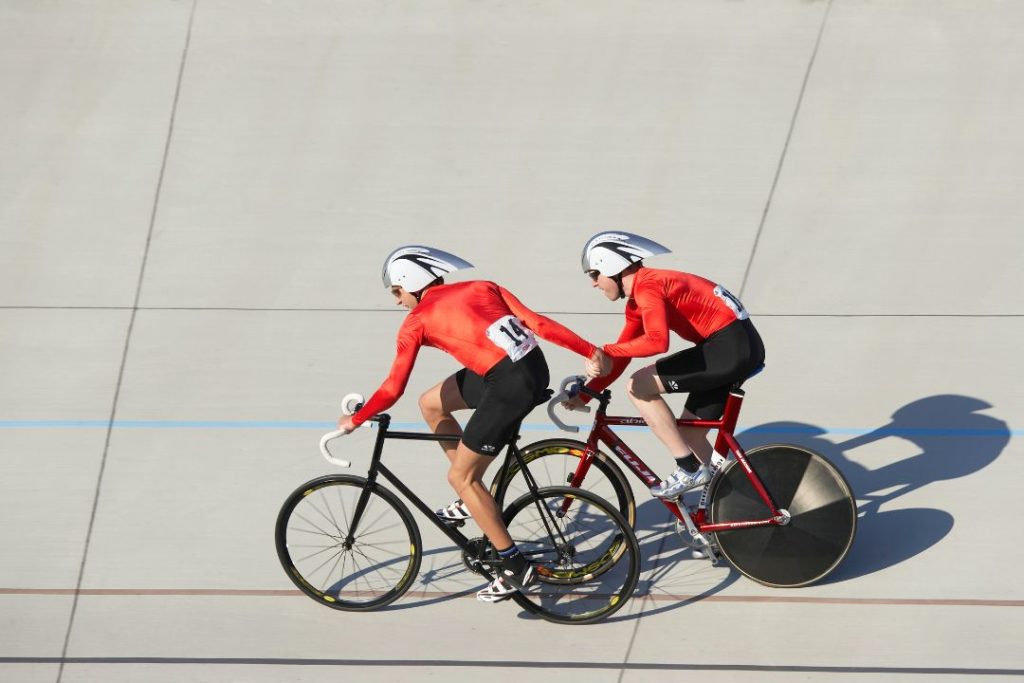
Track cycling differs from other modalities in its focus on pure speed, precision, and tactics. Every second counts, and every move must be calculated with precision. The track, often with banked curves and a controlled environment, requires cyclists to develop specific skills that cannot always be practised on roads or uneven terrain.

The importance of this discipline lies in its ability to enhance anaerobic power, reaction speed, and the ability to maintain high speeds over prolonged periods. Additionally, track cycling is an excellent way to improve pedalling technique, as any loss of efficiency is magnified in the track environment. Therefore, training specifically for track cycling is crucial for those who wish to compete at the highest level.

Ciclismo pista
Fuente: Canva

Benefits of training on a simulator

The cycling simulator has become an indispensable tool for cyclists looking to take their performance to the next level. These devices allow you to replicate track conditions very precisely, offering several key benefits.

One of the main benefits is the ability to train in a controlled environment. With a simulator, you can adjust resistance, incline, and other parameters to precisely mimic the conditions of a specific cycling track. This means you can train for specific competitions without having to travel to the track, saving time and resources.

Moreover, the simulator allows for constant performance monitoring. Most cycling simulators are equipped with sensors that measure power, cadence, speed, and heart rate in real-time. This information is invaluable for adjusting your training and ensuring that you are progressing effectively.

Another benefit is the ability to simulate race situations. You can program the simulator to replicate the exact conditions of a track race, including the changes in resistance you would face during a competition. This allows you to develop race strategies and mentally prepare for the challenges you will encounter.

Choosing the right equipment

To get the most out of a cycling simulator, it is essential to choose the right equipment. Not all simulators are the same, and selecting one that meets your specific needs is crucial to improving your track cycling performance.

The first aspect to consider is the compatibility of the simulator with your track bike. Some simulators require special adapters or may not be compatible with track bikes due to differences in frame design and rear wheel positioning. Ensure that the simulator you choose works well with your existing equipment.

It is also important to consider the accuracy of the simulator in measuring power. The most advanced simulators can measure power with 1% accuracy, which is crucial for track cyclists who rely on precise data to adjust their training. Additionally, ensure that the simulator can replicate the resistance you would experience on a real track, including the ability to simulate high speeds and rapid accelerations.

Another key aspect is the connectivity of the simulator. Many modern cycling simulators can connect to training apps and simulation software, allowing you to access a variety of routes and pre-programmed workouts. This not only makes training more varied and exciting but also allows you to compare your performance with that of other cyclists in real-time.

Adjusting the simulator to simulate track cycling

Once you have selected the right simulator, the next step is to adjust it to accurately simulate track cycling conditions. This process requires attention to detail and a clear understanding of the specific characteristics of the track.

The first adjustment you should make is resistance. In track cycling, the resistance you experience is much higher than in other disciplines due to the high speeds and the lack of natural wind. Ensure that your simulator is set to replicate this additional resistance.

Another important adjustment is cadence. Cadence in track cycling is usually higher than in road cycling, as cyclists aim to maintain a constant speed without sudden changes in resistance. Set your simulator to train at higher cadences, which will help you improve your pedalling efficiency and your ability to sustain high speeds over extended periods.

Finally, it is important to adjust the position of your bike on the simulator. The position on a track bike is more aerodynamic and aggressive than in other disciplines, aiming to reduce air resistance and maximise power transfer. Ensure that your bike’s position on the simulator reflects this setup so that your training is as realistic as possible.

Techniques to improve endurance

Endurance is a crucial component of track cycling, and training it effectively on your simulator can make a significant difference in your performance. Here are some key techniques to improve your endurance using a cycling simulator.

Firstly, high-intensity interval training (HIIT) is extremely effective for improving endurance in track cycling. These workouts involve alternating between periods of maximum effort and periods of active recovery.

Another useful technique is sustained endurance training. This involves maintaining a constant speed or power over a prolonged period, simulating the long straights of the track. This type of training is excellent for improving aerobic capacity and the ability to maintain a high pace during the race.

In addition, it is important to incorporate race simulation sessions. Use the simulator to recreate the conditions of a track race, including changes in speed and resistance. This not only improves your physical endurance but also mentally prepares you for the intensity of the competition.

Speed and power training

Speed and power are two of the most important aspects of track cycling, and the cycling simulator is an ideal tool for developing them.

To improve speed, it is essential to work on cadence and pedalling technique. Use the simulator to perform high-cadence workouts, focusing on maintaining smooth and efficient pedalling. This will not only increase your speed on the track but also reduce the risk of muscle fatigue.

Power training, on the other hand, focuses on the ability to generate the maximum amount of force in the shortest possible time. On the simulator, you can perform short, explosive sprint workouts, concentrating on generating maximum power with each pedal stroke.

ciclismo pista
Source: Canva

Simulating race strategies

Track cycling is not just about strength and speed; strategy plays a fundamental role in success on the track. Fortunately, a cycling simulator allows you to practise and refine your race strategies in a controlled environment.

Firstly, use the simulator to practise track positioning. Positioning in the group and managing energy during the race are essential for maximising your chances of victory.

Another important strategy is pace management. In a track race, knowing when to accelerate and when to conserve energy is crucial.

Finally, practise sprinting and attack techniques. These manoeuvres are essential to secure a victory on the track.

Monitoring and analysing performance

One of the greatest benefits of training with a cycling simulator is the ability to monitor and analyse your performance in real-time. This information is invaluable for making adjustments to your training and ensuring that you are on the right path to achieving your goals.

Firstly, it is important to monitor power. Power is a direct measure of your performance on the bike, and the simulator allows you to see how it varies during different types of workouts.

Additionally, analysing cadence and speed is crucial for understanding how you are progressing. If your cadence and speed are improving over time, it is a sign that your training is yielding results.

Common mistakes when training on a simulator

Despite its many benefits, it is easy to make mistakes when training with a cycling simulator. Here are some of the most common mistakes and how to avoid them to maximise the results of your training.

One of the most common mistakes is not adjusting the simulator to accurately reflect track conditions.

Another mistake is focusing solely on power and neglecting other aspects of training, such as pedalling technique or cadence.

Finally, not regularly monitoring or analysing your performance can lead to stagnation. It is crucial to review the data from each training session to identify areas for improvement and make the necessary adjustments.

Additional tips to optimise training

To optimise your training on a cycling simulator, here are some additional tips to help you get the most out of every session.

Firstly, vary your workouts. While it is important to follow a structure, it is also crucial to incorporate different types of training to work on all areas of your performance.

It is also advisable to perform cross-training outside the simulator. While the simulator is a powerful tool, complementing your training with strength, flexibility, and general conditioning exercises will help improve your track performance.

Finally, pay attention to recovery. Track cycling is a demanding discipline, and rest is essential to allow your body to recover and strengthen.

The simulator is a great ally for your training if your discipline is track cycling. BKOOL is a reliable tool to help you progress.

BKOOL is the most complete cycling simulator on the market, try it FREE for 7 days!

Functional Threshold Power (FTP) is one of the most important concepts for those looking to improve their performance in competitive cycling. This parameter, which measures the maximum average power a cyclist can sustain for about an hour, has become a key metric for structuring training, evaluating progress, and planning race strategies. While improving FTP is a common goal among cyclists of all levels, doing so efficiently and sustainably requires a science-based approach and advanced training techniques.

In this article, we will explore the most advanced strategies for optimising FTP, as well as common mistakes that can sabotage progress. We will also look at the role of nutrition, technology, and the use of cycling simulators in this process. If you are serious about your performance on the bike, FTP optimisation is a path that will significantly enhance your capabilities.

The importance of FTP in cycling performance

The relevance of FTP lies in its ability to serve as a direct indicator of performance in prolonged efforts, which are often key in long-distance races and events. For competitive cyclists, FTP determines how fast they can maintain effort without fatigue. It’s not just another metric; improving your FTP means enhancing your ability to sustain intense efforts for longer, which can make the difference between reaching the podium or falling behind in the race.

In both training and competition, FTP is a valuable guide for planning intensity zones. Knowing your FTP allows you to define your training zones more precisely, improving the efficiency of each session. For instance, doing intervals in a sub-threshold zone (just below FTP) helps you work on endurance without overstraining your energy reserves.

Methods for evaluating and measuring FTP

There are several ways to measure FTP, some more accurate than others. The most traditional method is to perform a 60-minute test, during which the average power output is measured. However, for many cyclists, this test is extremely demanding and difficult to complete correctly. Therefore, other more accessible tests, such as the 20-minute test, have become popular. In this, the average power sustained over 20 minutes is calculated, and the FTP is estimated by multiplying this value by a correction factor, generally 0.95.

Another option is using cycling simulators which offer an accurate FTP estimate based on specific training sessions and tests. These platforms use algorithms that analyse your performance under different conditions and provide a constant measurement of FTP over time, allowing you to track your progress in greater detail.

The use of a power meter is essential for these tests, as only power measurements can provide an accurate FTP value. However, it is important to note that this parameter can vary slightly depending on external conditions, such as temperature or fatigue levels.

Fuente: Canva

Training strategies to improve FTP

Improving FTP is no easy task and requires a planned approach that combines different types of training. One of the most effective strategies is threshold training or just below it. These sessions are typically done in intervals of 10 to 30 minutes at an intensity of about 90-100% of FTP. The aim is to accustom the body to sustaining high-effort levels for extended periods.

High-Intensity Interval Training (HIIT) also plays a crucial role in improving FTP. Short intervals at maximum intensity, followed by recovery periods, cause adaptations in both muscles and the cardiovascular system, which increase sustainable power in the long term. By alternating between threshold and HIIT sessions, you achieve the ideal combination to improve both endurance and the ability to perform intense efforts.

Consistency is key in any FTP improvement plan. Progress is not linear, and it is common to experience plateaus. However, with a well-structured training plan and the use of cycling simulators that allow you to adjust your sessions according to your fitness level, results will come.

Physiological adaptations to high-intensity training

Training to improve FTP induces a series of physiological adaptations that translate into better performance. First, mitochondrial density in the muscles increases, which improves energy efficiency during exercise. Mitochondria are the “energy factories” of cells, and a greater number of them means that the body can produce more energy with less effort.

Additionally, the cardiovascular system also adapts. The heart’s capacity to pump blood and oxygen to the muscles improves, increasing the workload capacity during prolonged efforts. The muscles’ ability to use lactate as an energy source is also enhanced, delaying the onset of fatigue.

This type of training also improves the muscles’ ability to tolerate stress, allowing you to sustain intensities close to FTP without tiring as quickly. All these adaptations are key to improving long-term performance.

The role of nutrition in FTP optimisation

A good diet is essential for improving FTP. Intense and prolonged training sessions require an adequate intake of carbohydrates, proteins, and fats. Carbohydrates are the most immediate and efficient source of energy during exercise, so they should be the main component of a cyclist’s diet who aims to improve their FTP.

Before a demanding session, it is advisable to carbo-load, ensuring your glycogen stores are full. During the session, if it lasts over an hour, it is important to replenish energy with bars, gels, or isotonic drinks to prevent early fatigue.

Hydration also plays a crucial role, as performance can be compromised if proper fluid balance is not maintained. Water and electrolyte losses during prolonged training sessions must be replaced to ensure optimal performance.

vacations
Picture: BKOOL

Using technology and data to improve FTP

The use of advanced technology has revolutionised how cyclists approach FTP improvement. Nowadays, power meters combined with platforms such as cycling simulators, allow for real-time, data-driven, personalised training. These systems offer structured plans that adjust to the cyclist’s fitness level and provide immediate feedback on each session.

Moreover, analysing historical data helps identify patterns of improvement or stagnation, which is crucial for adjusting training effectively. Technology also helps avoid overtraining, as you can monitor the workload and recovery time needed between intense sessions.

Cycling simulators not only serve for indoor training but also offer a virtual environment that emulates different types of terrain and weather conditions. This makes training more varied and engaging, while also allowing for the simulation of specific efforts, such as climbs or sprints.

Common mistakes in FTP training

One of the most common mistakes is training at the same intensity all the time. Many cyclists fall into the trap of constantly training near their FTP, which can lead to chronic fatigue and plateauing progress. It is important to vary intensities and alternate between hard sessions and active recovery days.

Another mistake is not paying enough attention to recovery. FTP improves not just with training but also with adequate rest. The body needs time to assimilate the training load and adapt to it. Ignoring recovery can result in overtraining and injuries.

It is also common for cyclists to underestimate the importance of proper nutrition, as mentioned earlier. Training without the necessary fuel can limit performance and the benefits of the training session.

Optimising FTP is a complex process that requires a multi-faceted approach. From proper evaluation and measurement of FTP to applying advanced training strategies, improvement in this metric is key for any cyclist aiming to compete at a higher level. Technology, nutrition, and adequate recovery also play a fundamental role in success. If you apply these strategies systematically, you will see significant improvements in your cycling performance.

One of the ways to train your FTP improvement is a cycling simulator and BKOOL can be the help you need.

BKOOL is the most complete cycling simulator on the market, try it FREE for 7 days!

We continue working to offer you the most complete virtual cycling experience, and for this reason we present this new version of our product with some very interesting new features.

NEW ONLINE SHOP WITH NEW PRODUCTS FOR YOU

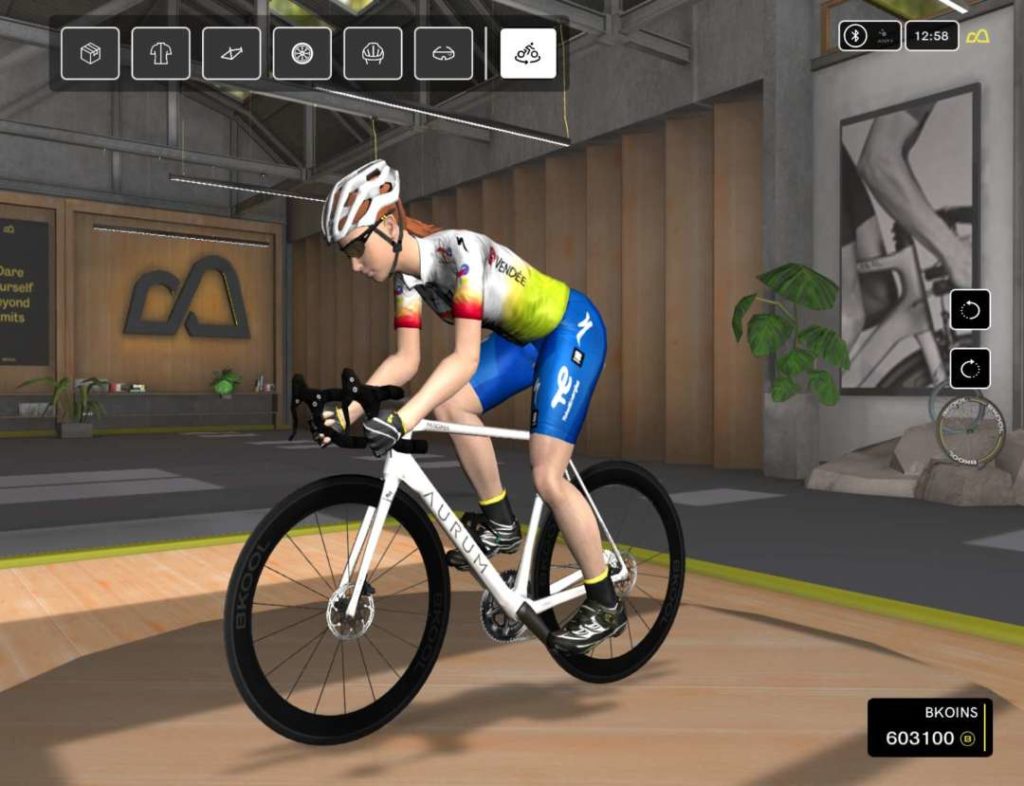
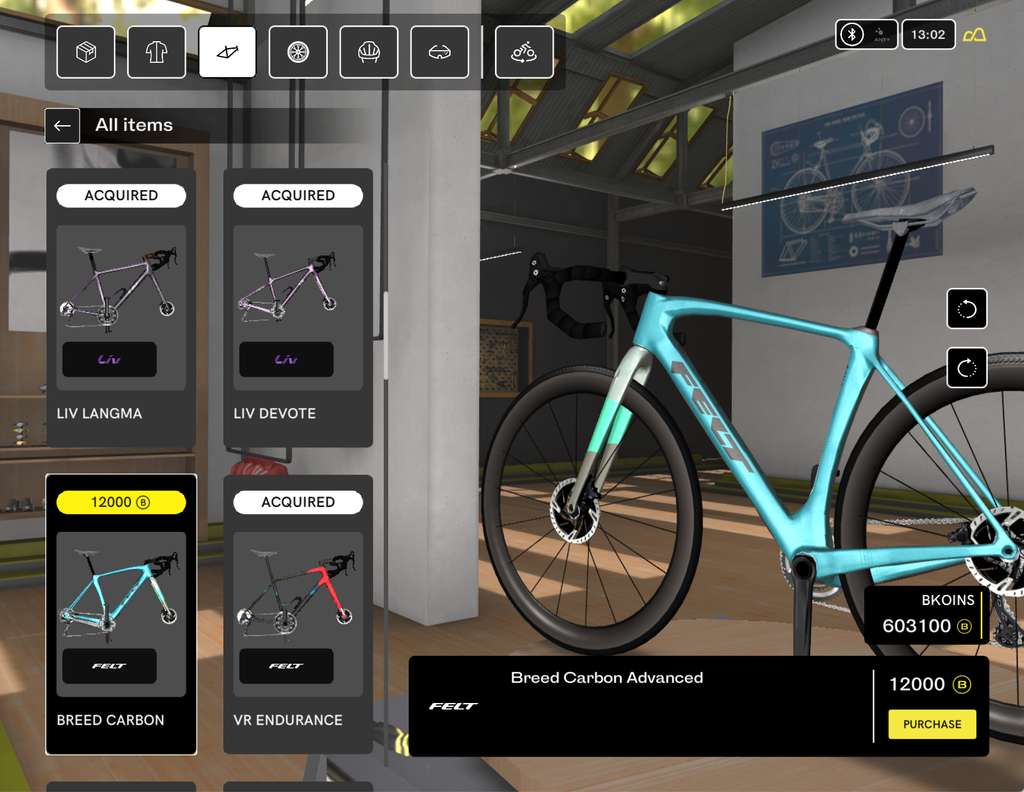
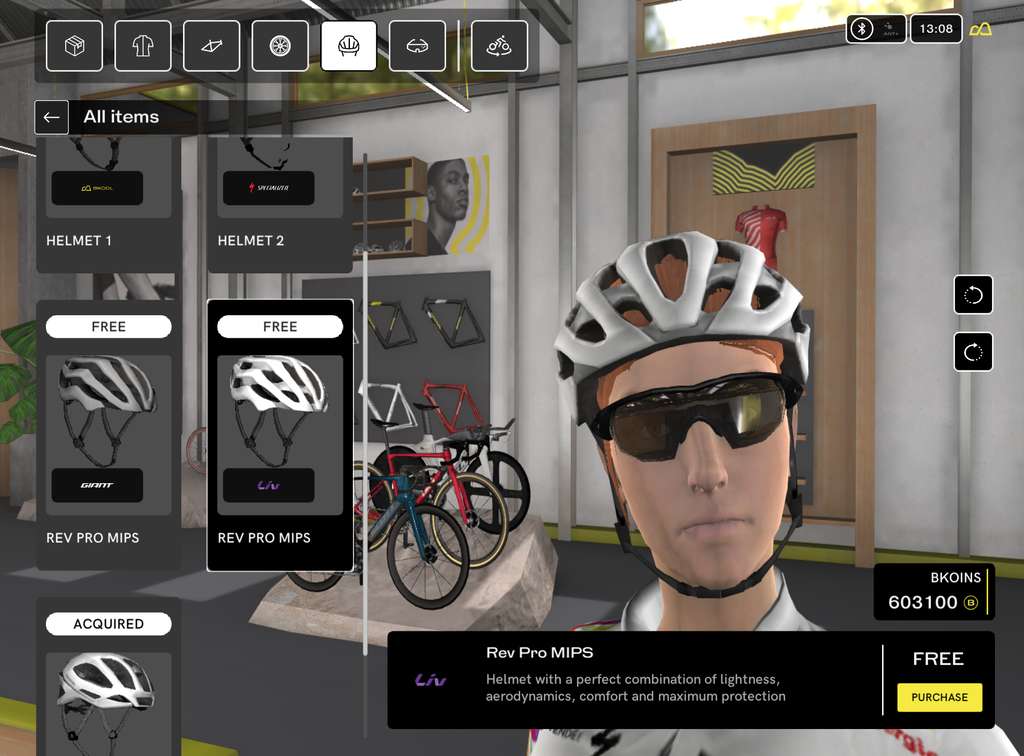
We have improved the look and feel of our online shop to make it faster, easier and more attractive. From now on, you will be able to enjoy an overview that allows you to see in detail what items you are equipped with.

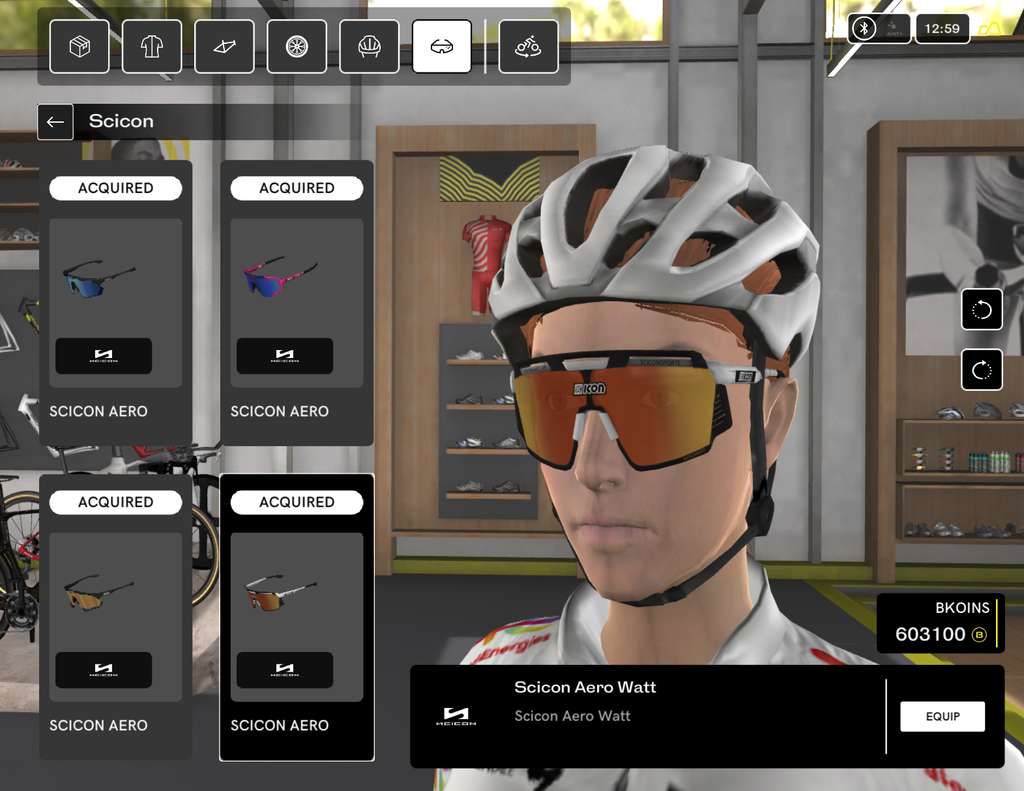
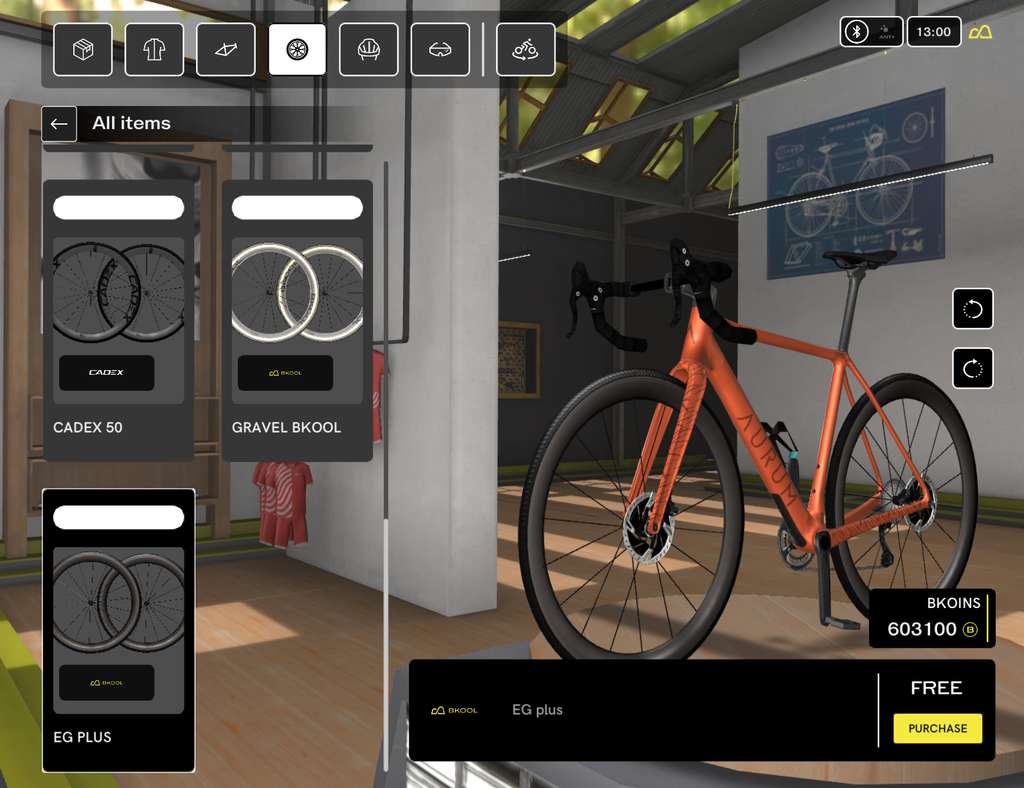
As if that weren’t enough, we’ve added new items that you’ll love and be able to buy with your Bkoins. You can find the latest wheels, helmets, goggles and frames to outfit your avatar and be the fastest on the road. What are you waiting for?

You can also buy a pack, which is a collection of items. If any of these packs contain items you have already purchased and have in your inventory, they will be deducted from the price.

LATE ACCESS

From this new version, you can decide whether or not you want other Bkoolers to be able to join the activity once the warm-up has finished.

  • LATE ACCESS : ON allows anyone to join the activity at any time.
  • LATE ACCESS : OFF allows anyone to join the activity only during the warm-up.

Once the activity has started, this value is no longer modifiable.

MODALITY

Setting up a new activity when it is being created will now be much easier with this new feature: the MODALITY. This is a quick and easy way to configure the characteristics of your training.

When you create an activity, you will be able to choose between different modes, which are associated with preset settings. You will be able to consult the modality configured in an activity that has already started. While the activity is taking place, it is not possible to change the mode.

There are two different types of mode, and each of them has associated default values for Warm-up Required, Late access and Share Data. This way, you can create an activity without having to change all the possible values one by one. These are the two types of mode:

  • FREE RIDE: although it has some default values configured, it allows you to configure it to your liking. In this way, you will be able to use the configurations as they existed until now. The default values are that late access is allowed, warm-up is not compulsory and data sharing is not possible.
  • POPULAR RACE has the useful defaults for a somewhat more competitive activity. It has a mandatory warm-up and late entry is not possible. By default, it does not allow data sharing, although this feature is modifiable.

All these new features are waiting for you. Ready for the most realistic virtual cycling experience?

BKOOL is the most complete cycling simulator on the market, try it FREE for 7 days!

Simulated altitude training has gained popularity in the world of cycling in recent years. This method offers an accessible alternative for cyclists who want to improve their performance without having to travel to mountainous high-altitude regions. But what exactly is this type of training? Is it truly effective? In this article, we will explore how it works, what benefits it brings, and how it can be practically applied in a cyclist’s routine.

Cycling is a sport that requires a unique combination of endurance, strength, and outstanding aerobic capacity. Simulated altitude training promises to enhance precisely these aspects, by replicating the conditions experienced at high altitudes to increase the body’s ability to transport and use oxygen. Throughout this article, we will break down the basics of this technique and its direct impact on performance.

What is simulated altitude training?

Simulated altitude training involves reproducing the conditions of low atmospheric pressure and low oxygen availability found in mountainous regions, but in a controlled environment at sea level. This is achieved through specialised devices such as hypoxic tents, altitude masks, or full room altitude simulation systems. These devices reduce the oxygen concentration in the air being inhaled, causing the body to respond as if training at a high altitude.

Unlike traditional high-altitude training, where cyclists have to travel to places like the Alps or Andes, simulated altitude training can be done from the comfort of your own home or in a specialised gym. This is particularly useful for those who cannot afford long trips or want to maintain a consistent routine without interruptions.

Physiological mechanisms of altitude training

The principle behind simulated altitude training is simple yet powerful: by reducing the amount of available oxygen, the body is forced to adapt and become more efficient at using it. When training in low-oxygen conditions, the body produces more red blood cells to transport the available oxygen, improving overall aerobic capacity. Over time, this leads to better performance when returning to training at sea level or in normal conditions.

Other physiological mechanisms that come into play include increased lung capacity, better distribution of oxygen in the muscles, and increased production of EPO (erythropoietin), a hormone that stimulates red blood cell production. All these factors contribute to greater endurance and faster recovery during prolonged efforts.

One of the most notable effects is the increase in VO2 max capacity, which is the maximum amount of oxygen a cyclist can utilise during exercise. This is essential for maintaining optimal performance in long-duration events, especially in endurance races or mountain stages.

Benefits of altitude training for cyclists

The benefits of simulated altitude training are numerous and specifically valuable for cyclists. Here are some of the most significant:

  • Improved aerobic endurance: As mentioned earlier, the body adapts to the low-oxygen environment by increasing its capacity to transport and use oxygen. This translates into greater aerobic endurance, which is key in long-distance races.
  • Higher power at lactate threshold: When training in hypoxic conditions, the body also increases its capacity to clear lactic acid from the muscles, meaning you can maintain a high-intensity effort for longer without experiencing early muscle fatigue.
  • Optimised recovery: Some studies suggest that simulated altitude training not only improves performance during exercise but can also speed up post-effort recovery, as the body becomes more efficient in tissue repair.
  • Increased red blood cell production: This results in better oxygen transport capacity, which is vital for maintaining a high effort level during long climbs or demanding stages.
  • Reduced adaptation time: One of the biggest advantages of simulated altitude training is that it allows cyclists to gain the benefits of altitude without having to go through a prolonged adaptation period.

Application of altitude training in cyclist preparation

Incorporating simulated altitude training into a cyclist’s preparation requires careful and consistent planning. It’s not just about using the equipment during any training session, but defining when and how to do it to maximise results.

A common strategy is the “live high, train low” approach, where the cyclist sleeps or spends several hours a day in a simulated altitude environment but trains at sea level or in normal conditions. This allows the body to experience the benefits of hypoxia during rest and recovery without compromising the intensity of training sessions.

Another option is to train directly in simulated altitude conditions, doing specific sessions where the oxygen concentration is reduced. These sessions are usually of lower intensity, as the perceived effort is higher, but over time they help to improve the body’s efficiency in using oxygen.

Equipment and technology for altitude simulation

The technology available to simulate altitude has advanced considerably in recent years. There are several options, from altitude masks that reduce the oxygen in the inhaled air to fully equipped hypoxic rooms.

  • Hypoxic tents: These are structures placed around the cyclist’s bed, creating a simulated altitude environment while sleeping or resting. These tents are often the most accessible option and are widely used by elite athletes.
  • Altitude masks: These masks allow high-intensity training in hypoxic conditions, as the device reduces the oxygen content in the inhaled air.
  • Hypoxic rooms: For those seeking a more advanced solution, some facilities offer fully controlled hypoxic rooms. These rooms allow long periods to be spent in low-oxygen conditions, ideal for cyclists looking for a more immersive experience.

Practical considerations and precautions

While simulated altitude training is a powerful tool, it’s not without risks. Incorrect or excessive use of hypoxia can cause unwanted side effects, such as extreme fatigue, dizziness, or sleep problems. It is crucial to follow a well-structured plan and, if possible, have the supervision of a specialised trainer.

Moreover, it’s important to note that not all cyclists respond the same way to altitude training. While some may experience significant improvements in a few weeks, others may need more time to adapt to the low-oxygen conditions.

Scientific studies and evidence

Several studies have supported the benefits of simulated altitude training, showing that cyclists using this technique experience improvements in VO2 max, lactate threshold, and overall efficiency. However, some studies suggest that the benefits may vary depending on factors such as genetics, prior experience, and training intensity.

What is clear is that when used correctly, simulated altitude training can be a powerful tool for any cyclist seeking to reach a new level of performance.

BKOOL is the most complete cycling simulator on the market, try it FREE for 7 days!

We know that many of our followers are mountain biking (MTB) enthusiasts, as some modern cycling trainers also support these types of bikes. So, this post is dedicated to all of you. We’re going to take a look at some of the most interesting and relevant facts from the world of mountain biking, a sport we’re also passionate about and which is gaining more and more fans in our country.

Gary Fisher, the inventor of MTB

To be honest, we must acknowledge that MTB was born as a result of a process of changes introduced by various cyclists. But undoubtedly, one of the most important contributions to developing what we now call Mountain Bikes was Gary Fisher’s idea of adding gears to his old Schwinn Excelsior, allowing him to expand his routes into the mountains.

The concept of MTB began to take shape in the 1970s when a group of cyclists in California started organising downhill races along the fire roads of Mount Tamalpais. They soon realised that road bikes were far from ideal for this type of competition and began making modifications to their bikes. Another pioneer alongside Fisher was Joe Breeze, who also introduced several changes to his Schwinn Excelsior to adapt it to the rough conditions of the fire roads. Their ideas were an overwhelming success, and soon the two began selling what are considered the forerunners of modern MTBs.

However, it wasn’t until 1979 that Fisher, now partnered with Charlie Kelly, released what is regarded as the first Mountain Bike in history, selling 160 units.

As a fun fact, Gary Fisher was banned from these types of competitions from 1968 to 1972 for having long hair.

Today, Fisher owns a renowned bike brand, famous for its innovations, including 29-inch wheels.

Ned Overend and the first MTB videos in history

When it comes to Mountain Bike videos, Ned Overend deserves special recognition. Ned started getting into MTBs in the early 1980s, when this type of bike was beginning to gain popularity among cycling enthusiasts in some countries.

In 1988, the first-ever MTB video, titled “The Great Mountain Biking Video”, was filmed, featuring several Mountain Bike professionals like John Tomac, Martha Kennedy, and Ned Overend himself. The film was not only the first of its kind to showcase mountain biking techniques, but it also introduced the innovative use of helmet cameras.

Just two years later, Ned was one of the participants in the first MTB race ever recorded on video, titled “Battle At Durango: The First-Ever World Mountain Biking Championships”. These contributions, along with his lifelong passion for MTBs, led to his induction into the Mountain Bike Hall of Fame in 1991 and the United States Bicycle Hall of Fame in 2001.

Julien Absalon, the golden man

Mountain biking is now a sport with a vast number of fans and professional cyclists. Among the latter, one name stands out above the rest due to a record-breaking career that has made history. That name is Julien Absalon, possibly the greatest professional MTB cyclist of all time.

A quick glance at his career shows two Olympic gold medals (Athens 2004 and Beijing 2008), five World Championships (2004, 2005, 2006, 2007, and 2014), and four World Cups (2003, 2006, 2009, 2014), among many other accolades.

Undoubtedly, he is one of those star athletes, capable of becoming World Champion again last year after seven years without winning the title, and we’re sure he’ll continue making history.

Eric Barone and the MTB speed record: 223 km/h!

In this case, we don’t have to go too far back in time. Just over a month ago, on 28th March 2015, Eric Barone broke the world speed record on an MTB, reaching 223 km/h during a descent on snow at the Les Arcs ski resort. He achieved this at the age of 54 after dedicating half his life to mountain bike downhill racing. But we won’t say any more. It’s much better for you to enjoy the spectacle with your own eyes:

BKOOL is the most complete cycling simulator on the market, try it FREE for 7 days!

One of the most common questions when buying a bike is whether to choose a road bike or a mountain bike. As enthusiasts of indoor cycling, we don’t have a clear preference since the best current bike trainers accommodate both types. Some even allow for wheels up to 29 inches.

However, we understand that it’s not easy to choose one over the other initially, so we’ll help you decide which type of bike and, consequently, activity best suits your preferences and needs.

Road Bikes

– Price can be a deciding factor, especially if you’re an amateur cyclist. Basic road bike models tend to be slightly more expensive than mountain bikes.

– If you love speed, this is the bike for you. Road bikes are much faster than mountain bikes due to their design and the conditions of the terrain.

– When it comes to weight and handling, road bikes are also the better choice. However, be cautious; their increased speed and lightness might make your initial road experiences a bit challenging. Opt for easy, flat, and comfortable routes for your early rides.

– Weather conditions affect road bikes less since the terrain remains relatively unchanged. While tires handle wet roads differently than dry ones, if you don’t want to return covered in mud every time it rains or even on subsequent days, a road bike is a better option.

– They are more dangerous. This point is crucial for amateur cyclists. We don’t want to scare you, but we do want to make you aware and cautious. Road bikes involve dealing with traffic and higher speeds at certain times. Don’t forget to wear a helmet, appropriate protection, and lights.

Mountain Bikes

– Basic models are generally cheaper than road bikes, but if you want a bike of decent quality, prices can become quite similar.

– The top speed is lower, but you can vary the terrain and explore more diverse routes, mixing road sections with trails or even steeper paths as your bike skills improve.

– Mountain bikes are more stable and generally more robust and heavier.

– They are usually safer, although it depends on the trails you choose. To truly enjoy yourself, you should progressively increase the difficulty of the trails as your skill level grows, always with caution and the right protective gear.

– These bikes are primarily designed for off-road and mountain use. If you live in a city, they can still be an option, as long as you can alternate between city streets and countryside outings to enjoy their features.

Surely everyone reading this who rides a bike has at some point felt the sensation of “freezing” while on a bike. The low winter temperatures, the speed of cycling, the wind, and sometimes the rain tend to make a bad combination.

We need to be clear that when it’s really cold, it’s practically impossible to fight it, and that unpleasant feeling is inevitable. However, knowing how to choose the right clothing based on the weather will undoubtedly help make our training more comfortable, and our health will thank us for it. Moreover, if we manage to wear the right clothes for optimal body thermoregulation, our performance won’t be negatively affected.

Nowadays, clothing brands offer us a wide variety of garments, fabrics, and styles. I will speak from my experience about the clothing combinations I consider the best for training in winter.

LEGS: Usually, a long bib is sufficient. There are thinner or thicker ones, even with fleece lining inside. Choosing the right one, as I mentioned, is generally enough. When spring is approaching, I sometimes like to wear a short bib with leg warmers, so I can switch to shorts halfway through the training if I get warm.

UPPER BODY: This is the most complex due to the number of possible clothing combinations. I usually like to wear three layers:

  • The first layer is an undershirt, usually thin, close-fitting, and breathable so it doesn’t soak up sweat. If it’s very cold (below 5ÂșC), I wear long sleeves, and if it’s above 5ÂșC, I opt for short sleeves or a tank top.
  • The second layer is a long-sleeve jersey, also breathable. I like this garment not only because it doesn’t get soaked with sweat but also because I can make use of the rear pockets, as I tend to carry quite a few things, as you’ll see later.
  • If the temperature is above 13Âș-14ÂșC, the previous two layers are usually enough (or those two layers with a thin vest). But in winter, that’s not common, so on top of the undershirt and long-sleeve jersey, I usually wear a third layer. This third layer, when the temperature is between 6Âș and 12ÂșC, is typically a thin jacket or another long-sleeve jersey, often the same as the one underneath. This way, I stay warm, but since all layers are breathable, I don’t usually get damp from sweat. If it’s colder, 5ÂșC or below, this third layer is a winter jacket, made of Gore, Windstopper, or something similar.
  • In extreme cold, on top of the three layers, I also wear a winter vest made of Gore or Windstopper.

That said, I need to mention two garments that can be very helpful in winter, but you need to know how and when to use them:

  • The Gabba-style jackets that have hit the market in recent years, which are not 100% waterproof but almost, and they provide great warmth. They are an excellent solution for days with light rain and don’t create the same “sail” effect as a conventional raincoat. However, they are usually tight-fitting garments, and if they are too tight, they can even make breathing difficult. Also, since they don’t breathe as well as other fabrics, they can cause dehydration more easily. In my opinion, they are useful either for days with very extreme weather, where it’s either using the Gabba or not riding at all, or for short and light training sessions where dehydration is not an issue.
  • The traditional raincoat, which is obviously very useful on rainy days, but I carry it in my jersey pocket EVERY winter day, even when it’s sunny. It’s the best ally to avoid that freezing cold after a short stop due to a flat tire or at the top of a climb to regroup. On sunny days, putting on the raincoat for the first 5 minutes after a short break and then removing it before starting to sweat can save you from many moments of cold and more than one cold. I want to emphasize the importance of knowing when to remove the raincoat on those days when it’s used not for rain protection but as an extra layer of warmth. To use it properly, we need to remove it as soon as we feel our body is warming up but before we start sweating. If we start sweating, it’s too late, and we’ll already be soaked, which is what we want to avoid.

HANDS: There are countless gloves on the market, made from all types of fabrics—Windstopper, neoprene, Gore, etc.—but we also need to maintain some sensitivity in our hands to grip the handlebars, shift, brake, etc. For that reason, I usually have three combinations depending on the temperature:

  • If it’s below 5ÂșC, I wear my warmest gloves, made of Gore on the outside and lined on the inside. I lose some sensitivity for handling the bike, but I more or less avoid the cold.
  • Between 5Âș and 8ÂșC, I wear very thin gloves with another pair of Windstopper gloves on top. Halfway through the training, I usually remove one pair and store them in my jersey.
  • Between 8Âș and 12ÂșC, I leave the house with thin gloves that I take off and put on several times throughout the training session.

FEET: On the bike, this is one of the body parts that gets the coldest because the foot muscles remain mostly still and are very exposed. Additionally, being close to the ground, if it’s damp or wet, they always end up getting some water. There are also many possible combinations to combat this.

  • When it’s over 8ÂșC, I usually don’t wear anything extra, just a relatively warm sock and my cycling shoes.
  • Between 3Âș and 8ÂșC, I also wear neoprene toe covers.
  • Below 3ÂșC, although it’s almost inevitable to feel cold, I wear Windstopper overshoes and sometimes two pairs of socks.
  • In rain and on wet ground, I either wrap my shoes in plastic wrap and then wear the overshoes, or if the ground is wet but it’s not cold, I wear latex overshoes just to keep my feet dry.

HEAD AND NECK: Personally, I don’t like wearing anything more than a helmet and glasses because everything else feels uncomfortable. However, in very cold situations, a neck warmer and an ear band under the helmet can help a lot to remove that cold feeling and protect our throat from low temperatures.

To conclude, and going back to the importance of having pockets, maybe experience or years of cycling have made me a bit obsessive, but when one of these “obsessions” saves me from a cold moment, I feel really good. So, during the winter, my jersey pockets always contain:

  • Tool kit (I carry this all year round)
  • Some money, a credit card, ID, and my federation license (I carry this all year round)
  • Raincoat (even if it’s not raining, as mentioned earlier)
  • Spare gloves on rainy days to put on a dry pair halfway through the training session
  • A dry undershirt for days with climbs when I might sweat a lot, so I can change the first layer midway through the training session.

Jose Almagro Valero

Bachelor in Physical Activity and Sports Sciences

National Cycling Coach

www.josealmagrovalero.es

Regular bicycle maintenance not only saves us from unnecessary trouble, such as malfunctioning or broken parts due to uncontrolled wear, but it also helps save money, prevents accidents, and ensures greater efficiency by keeping the equipment in optimal condition for sports and competition. Here are some tips that we hope you’ll find useful.

Cleaning

To clean your bike, use household products. Water, soap, and a basin or bucket. With a sponge (be careful it doesn’t scratch), scrub it well with water and soap. If you’ve been riding off-road and there’s a lot of mud, a good hose down first to remove or soften the mud won’t hurt.

How do we leave the chain grease-free? We have several options:

  • Before starting to clean, apply a degreaser like Kh7 to the drivetrain to let it work (be careful with some degreasers as they can damage the paintwork).
  • Once the bike has been scrubbed well with the sponge, use the same soapy water with a small, medium-bristled brush to scrub the chain (this will remove the degreaser residue, and you can use the soapy water to brush it off, the last step before discarding the now-black water). Then hose it down, and the first part is done.

Drying

  • A tip: if it’s summer, leave the bike out in the sun, and if you want to do it better, use a cloth and dry it as much as possible.

Lubricating the chain

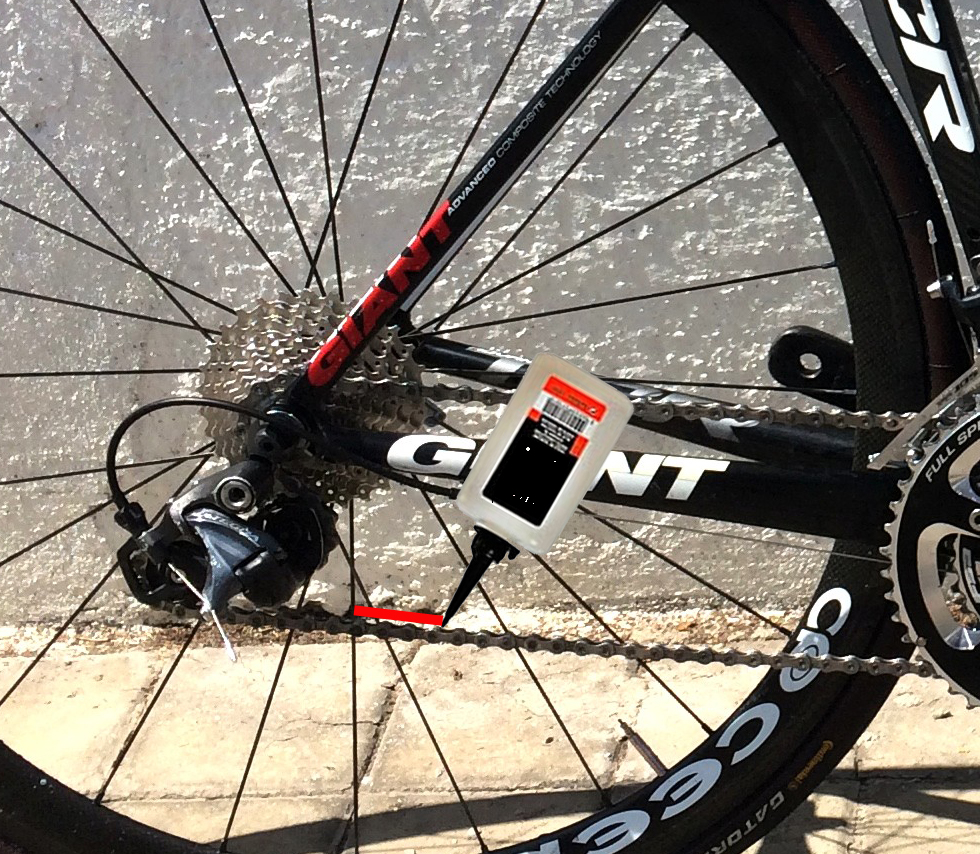
  • Before lubricating the chain, there are specific products on the market to remove grease in spray form. Any car degreaser or even disc brake cleaner will do. Don’t apply it directly to the chain; spray it on a cloth and then run the cloth along the chain to make it shine.
  • Apply oil or chain wax to the inside of the chain, as shown in the picture above.

Final tightening

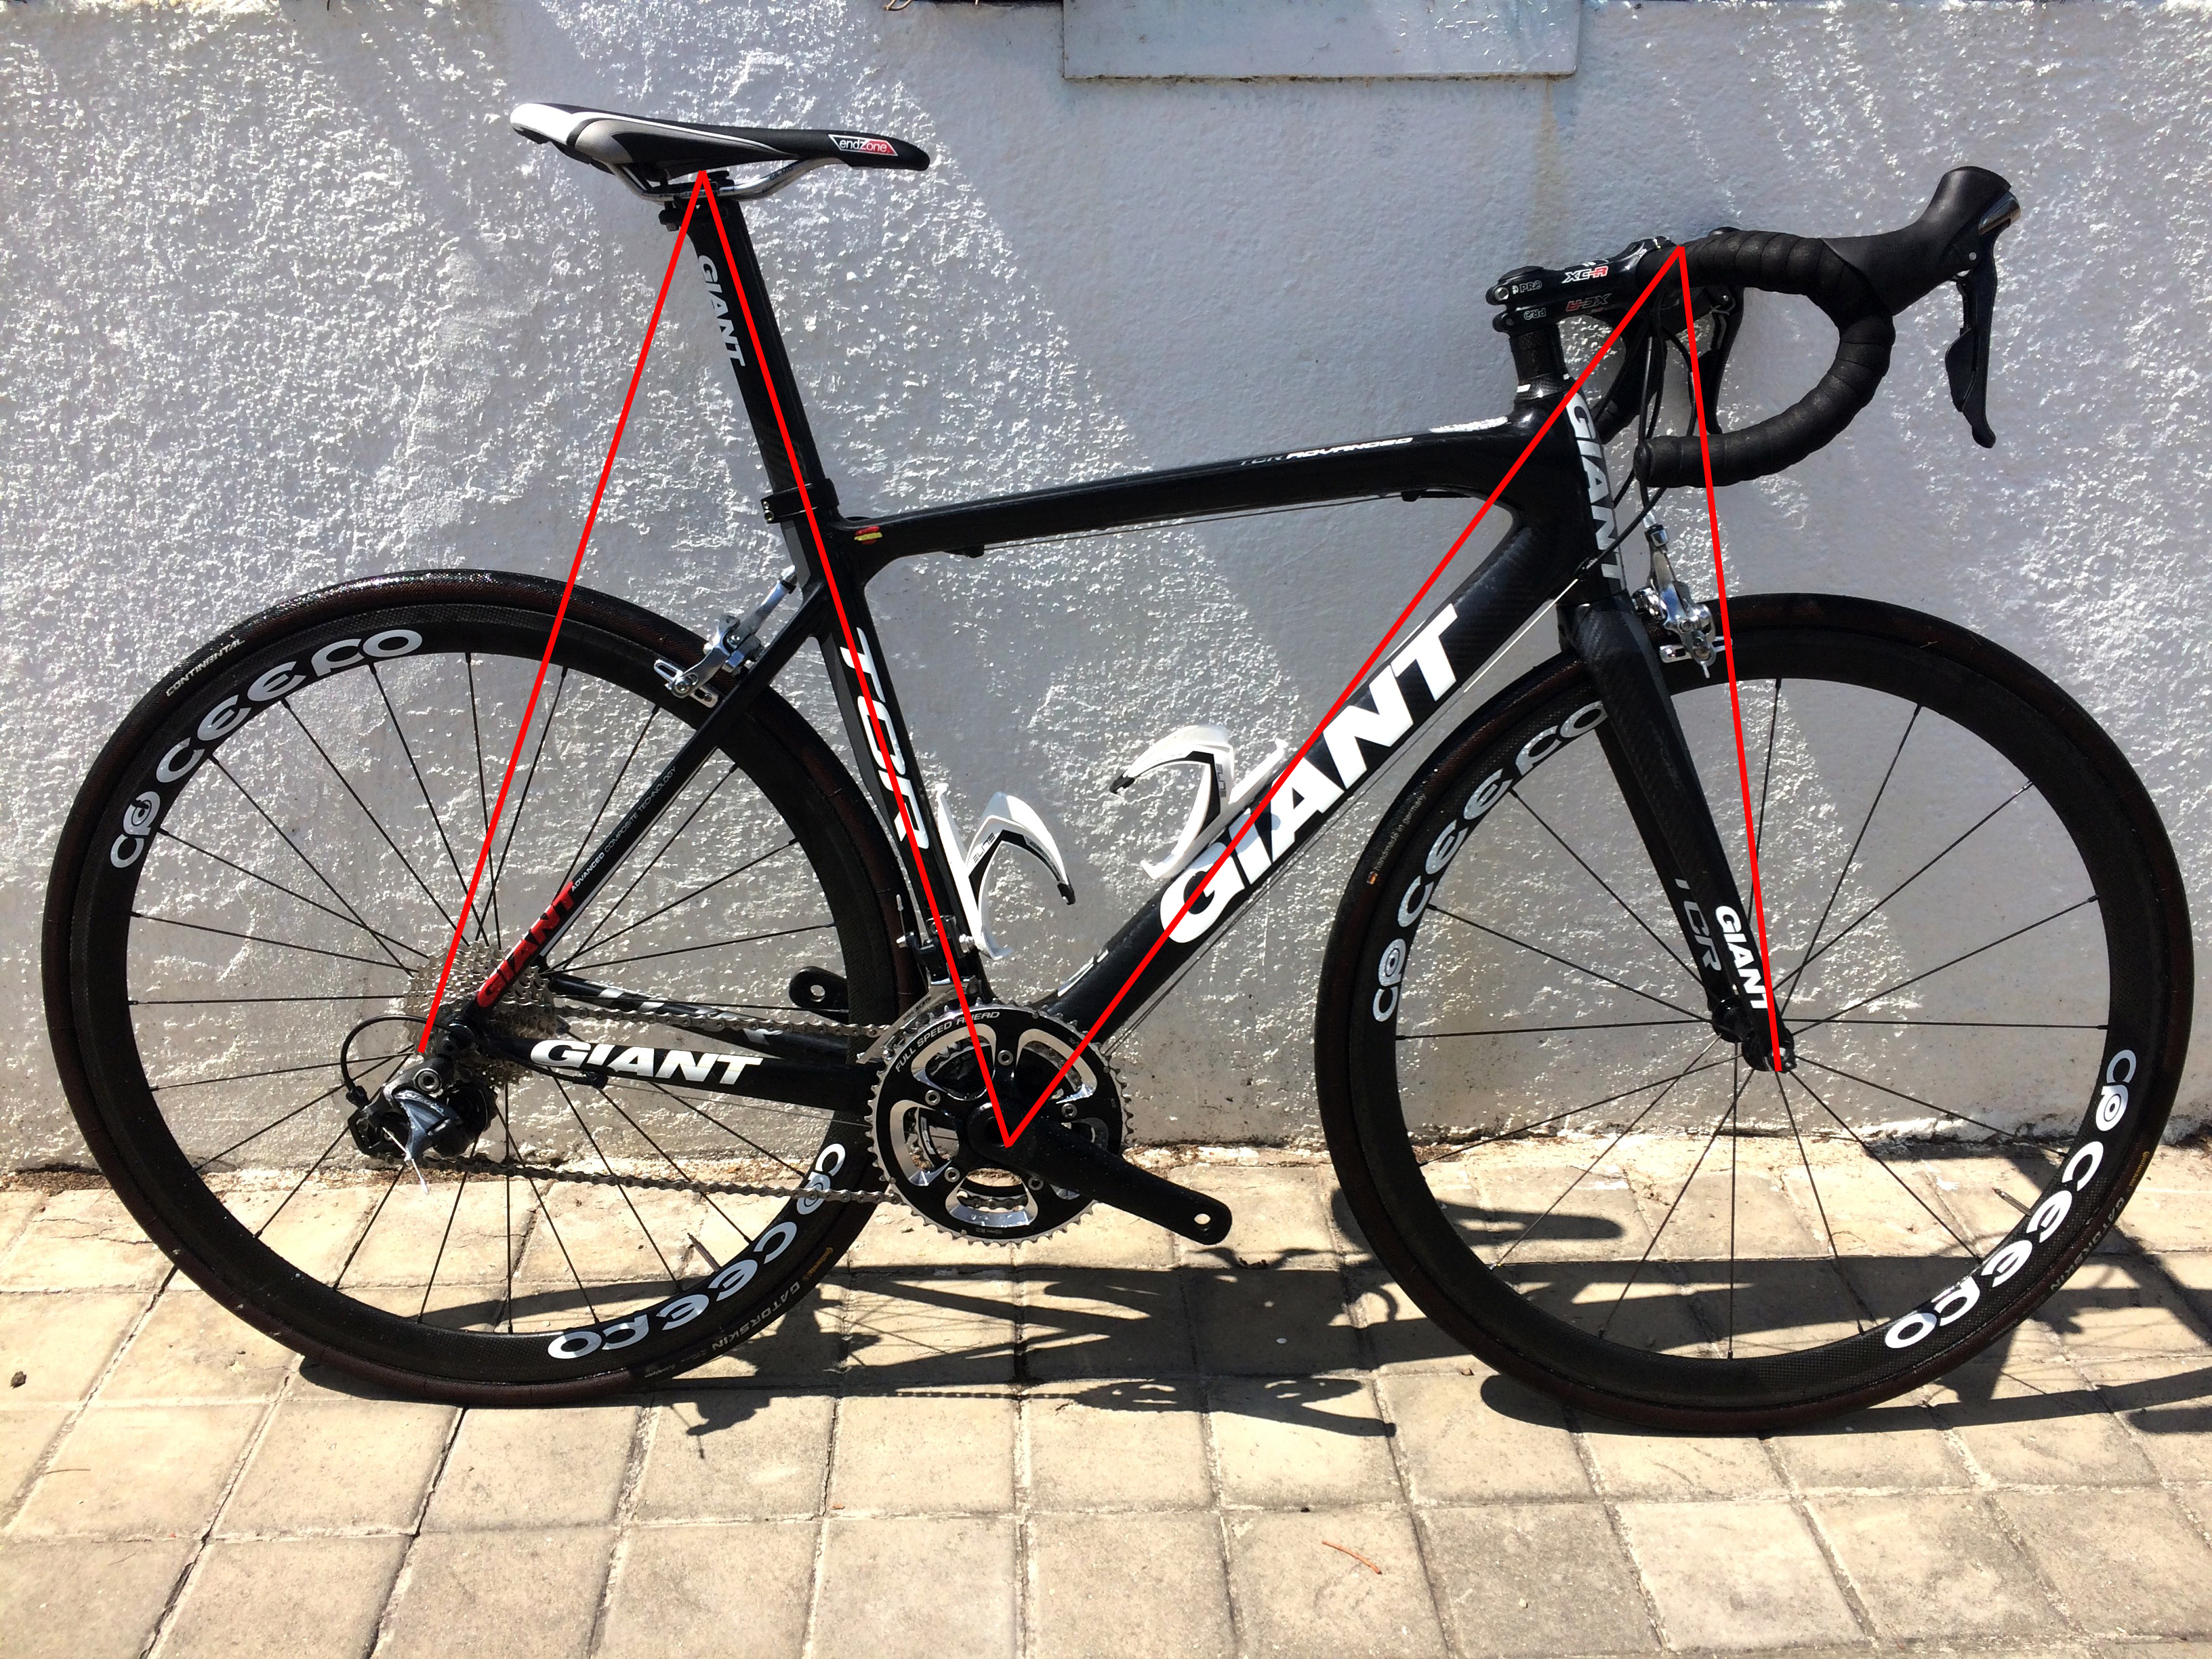
  • The proper tightening of bolts is crucial. Each bolt has a recommended torque, so there’s no need to tighten until it “creaks.” Just make sure they’re not loose.

A good method to ensure you don’t miss any is to use the M-check, from the rear derailleur to the front wheel. If you always use the same method, you’ll have everything under control.

Luis SĂĄnchez from Bikeclinic.